 |
|
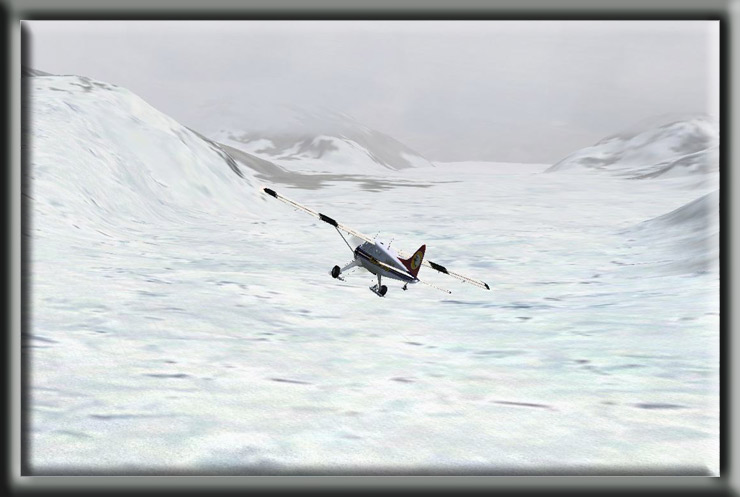
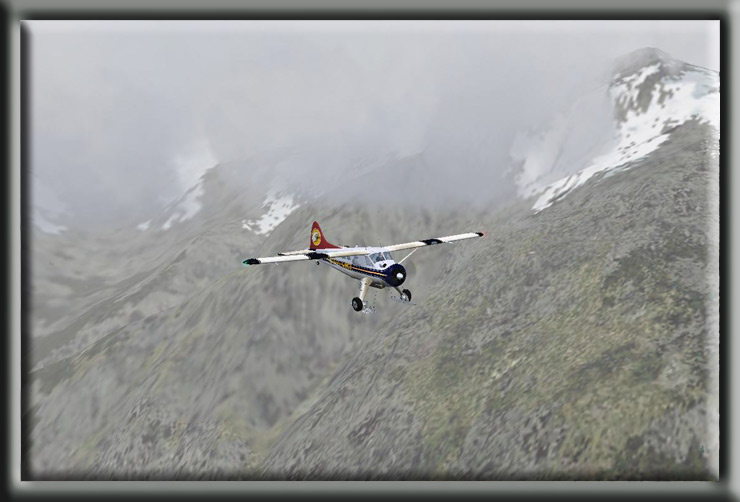
VFR Flight (Ski plane glacier flight)
|
|
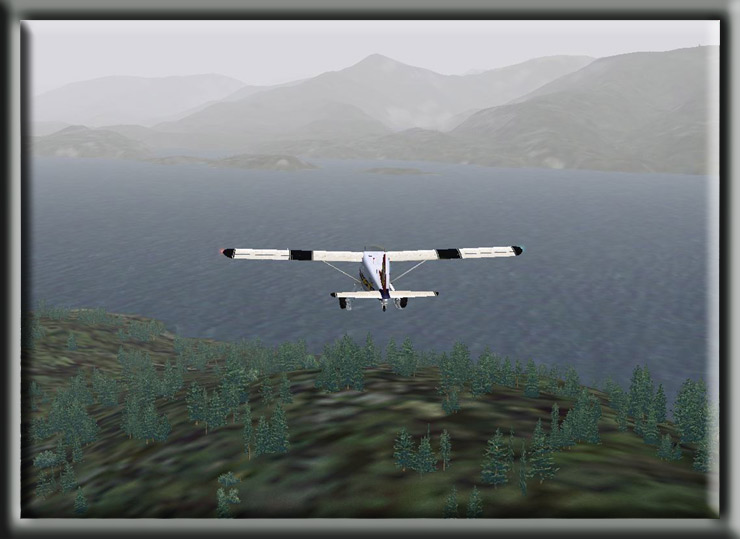
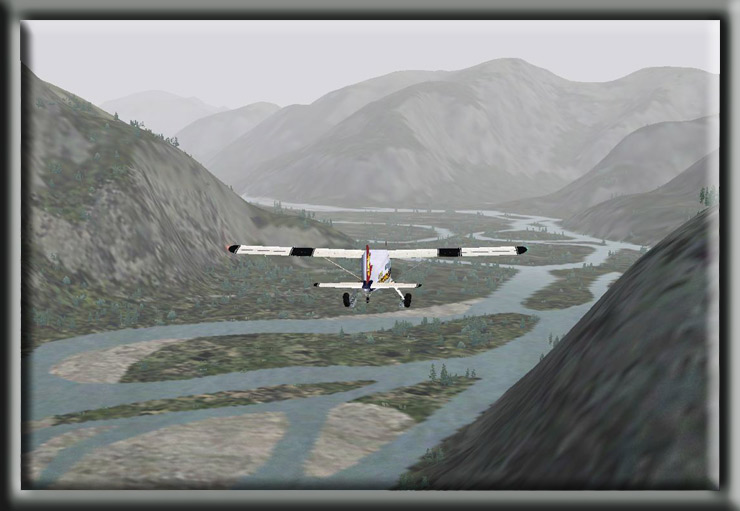
The Flight This is a typical sight-seeing tour that leaves from Ketchikan International Airport (PAKT) and flies not direct either directly or indirectly (your choice) for sightseeing to the Glacier area of the Misty Fjords National Monument. There are three sections to this "charter." First there is the "approach" ... this consists of the first 6 fixes, giving sightseeing information along the way. Then you have a choice to fly to the Leduc or Chickamin glacier. The flights are set up for "pure" VFR, treetop flying. This charter package gives you one route to the glaciers, to the outflow of the Chickamin River, but two alternatives for flying to and through the glacier areas, Leduc and Chickamin. Both give you breathtaking views of the river basins leading away to the glaciers and very different ascents and descents up to the glaciers and back down to the Portland Canal. Once you've flown the approach, you may want to start again at the outflow of the Chickamin and take the alternative route. Start your flight at Ketchikan International Airport (PAKT) and, if you want to land on the glacier, your aircraft should have skis. (Although this flight can be made in the comfort of a twin engine aircraft for more speed and comfort ... obviously not landing on the glacier!). Both flight alternatives will terminate in Stewart, BC at the very head of the Portland Canal, near the small Alaskan settlement of Hyder, AK. |
|
|
|
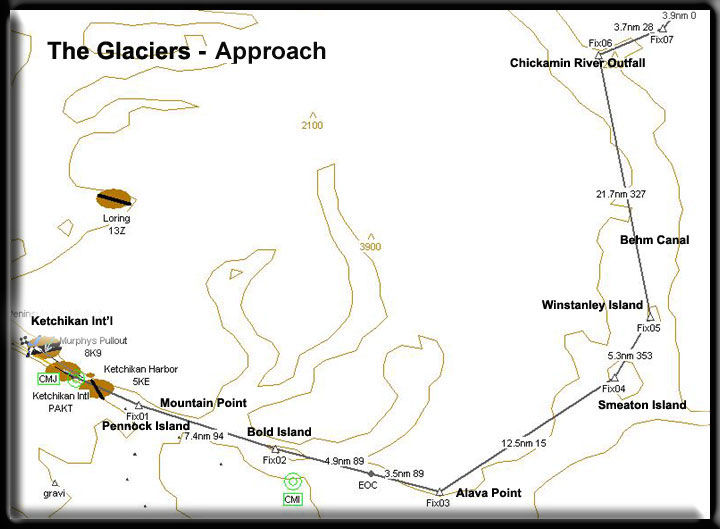
To the Glaciers - The Approach (Fixes 1-6) The Glacier Charters ... Ketchikan Route Notes:
Direct Routing: At Mountain Point, set a heading of 006 and fly for 39 miles to the outfall of the Chickamin River. (Or fly the scenic route starting with Fix 1 below). If the weather is good, and you do not wish to fly the scenic route, you can fly a direct route to Fix 6, the outfall of the Chickamin River. First, fly over Pennock Island to Mountain Point, this is the point of land on the east side of the Tongass Narrows at the very south end of the channel. Once you are there, you should have sufficient altitude to set a heading of 006 for 39 miles at a minimum altitude of 4500 feet en route to Fix 6, the outfall of the Chickamin River into the Behm Canal. This will take you direct to Fix 6 and keep you above the mountains. Ketchikan Airport - Start in the Ketchikan Area, either at the international airport, the floatplane base or Totem Bight Floatplane Base. Ketchikan's History dates back to 1883, when a man named Snow
built a salmon saltery. Two years later, businessmen from Portland,
Oregon, hired Mike Martin to investigate possibilities for building
a salmon cannery on the banks of Ketchikan Creek. By the early 1900's,
Martin and the cannery's manager, George Clark, had set up a partnership
and had opened a saltery and a general store. Two years later, with
the fishing trade flourishing, Ketchikan was definitely in business.
And by 1900, with a population of 800, the town was officially incorporated.
(See
Note 1) Ketchikan is well known as the salmon capital of the world and
a paradise for sport fishermen and naturalists alike. During the
summer months, the town bustles with visitors from all over the
world. While the rustic boardwalk on Creek Street preserves a distinct
historic feel, the town hums with new construction to keep up with
the ever-expanding wave of tourism. Ketchikan has a population of
14,500 and is built along a steep hillside, with sections of the
town built right over the water on pilings. An outstanding collection
of totem poles make a visit to Ketchikan essential for anyone interested
in Native art. Ketchikan's name supposedly comes from the native
term "Katch Kanna", which roughly translates: "spread
wings of a thundering eagle" and rightly named, for you only
need to look along the water line and you're likely to see many
bald eagles on waterside perches. (See
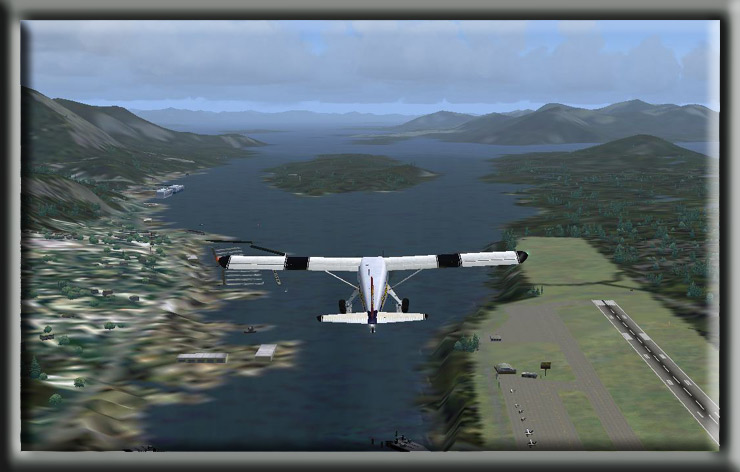
Note 1) After we take off from Ketchikan International Airport (PAKT) we will position ourselves southbound over Pennock Island, a large island in the center of the Tongass Narrows (channel). Ketchikan will be on our left. As you approach Pennock Island, you will be flying over the busy floatplane base 5KE in Ketchikan Harbor. On the leading area of the island slightly to the east, notice the wind generator. The cruise ships tie up to the dock directly in front of the wharf at Ketchikan, don't be surprised if you don't encounter cruise ships during our flight. As you come over Pennock Island, you will see the US Coast Guard Base (complete with cutter) there on the east side of the channel. Also along the waterfront just 2 1/2 miles south of Ketchikan
is the Native City of Saxman, the small community is just past the
US Coast Guard base. It was founded in 1894 and named after Samuel
Saxman who came to Alaska to teach school and settled on Tongass
Island, then a village site. When the Cape Fox and Tongass peoples
decided to combine into one village, Samuel and several Native companions
left on a search for a new site. They never returned and were lost
at sea.(see
note 2) Fix 2 - At Bold Island, set a course of 089 for Alava Point, the point of land at the entrance of the Bhem Canal 5 miles ahead. You are now flying over the Rivillagigedo Channel. The small Spire Island is coming up just to our right. Watch the channel carefully as we fly and you will see the navigational channel markers blinking along the way. To the left of Bold Island is a little cove called Coho Cove. Look closely and you will see Antelope Ranch there, complete with bed and breakfast, a dirt runway and a water Hangar and dock. The body of water coming up on the left is the Thorne Arm and it goes in that direction for nearly 40 miles. There are some beautiful sights along this part of the Misty Fjords. The tiny island just past Bold Island is Round Island.
Fix 3 - At Alava Point set a heading of 015 for Smeaton Island, about 12.5 miles ahead. Before we reach Smeaton Island, we will first fly over Fox Point and then Rudyerd Island comes up dead ahead. As you cross Rudyerd Island, you now have a good view of Smeaton Island, our next waypont. As you approach Smeaton Island, make sure you are at a minimum of 1500 feet, as its altitude is 1400 feet. As we fly to Smeaton Island, there are several notes of interest. First, we will fly over Alava Bay, coming up to your left. Look closely at the larger island and you might see the Alava Bay cabin, one of the US Forestry Service maintained cabins. You can stay at these for about $25 a night. They are very rustic, mostly with an outhouse and a mop. And if you go to their website, they'll even tell you to bring a 30.06 rifle along for "safety"!
Fix 4 - At Smeaton Island, set a course of 353 for Winstanley Island. As you approach Winstanley Island, watch for the lakes to your right. Winstanley Lake is in that direction about 5 miles, there are two US Forestry Service Cabins there. The small island ahead of us just before we get to Winstanley Island is Candle Island. We use Candle Island as a visual navigational fix to service the cabins in that area. Fix 5 - Over Winstanley Island, set a heading of 327 that takes you to the outfall of the Chickamin River.The Chickamin outfall is our key waypoint for entering the glacier area of Misty Fjords. As we cross over the north end of Winstanley Island, you will see a small cove, on that cove is another US Forestry Service Cabin ... look closely, you can sometimes see the smoke coming from the cabin. Just to the left of our course is "New Eddystone Rock" ... this is an interesting structure that looks like a chimney, (a 230 foot tall tower of basalt in real life). To the right are the tiny Eddystone Islands that are made of the same material. We continue on a course of 357 for about 21 miles. We will cross over Cactus point and Manzanita Island along the way.
Fix 6 - The Chickamin River Outfall At Fix 6, you turn into the Chickamin River basin. Set your heading for 026. As you approach this fix, you will be wanting to either decide to go to the Leduc or Chickamin glacier. Once that decision is made, be sure you have the correct flight plan loaded and go to The Leduc River Route or to the Chickamin River Route (all below). As you move to Fix 7 in one of the two alternatives below, you
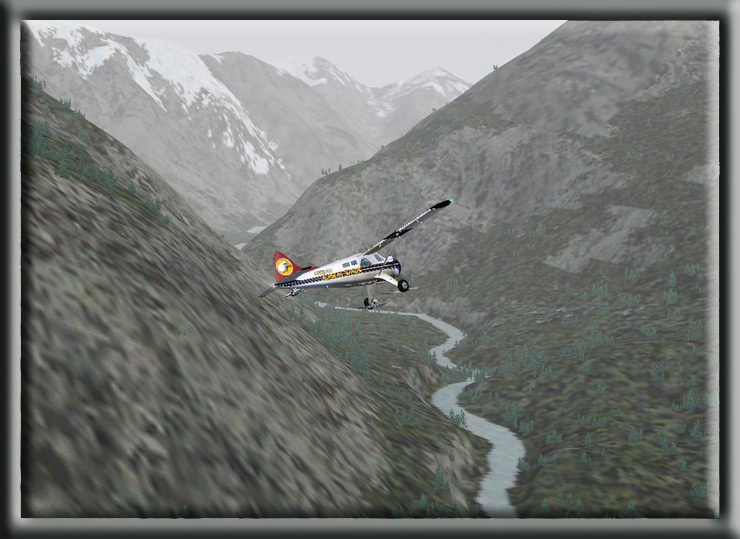
will have to spend most of your time watching your altitude and
changing your headings to keep your aircraft safely flying through
the mountainous mazes that lie ahead. You will be busy indeed, but
enjoy the scenery as you fly. This is why the Misty Fjords scenery
package was created, to give you, the virtual pilot a "near-real"
experience of flying through the beautiful Alaskan landscape.
|
|
Entering the Chickamin Outfall Route Notes:
At Fix 7, you will see the rivers splitting. The Chickamin River goes off to the right and the Leduc, which we will be following goes off to the left. At fix 7, turn to the left and set your heading for 353 and fly straight for about 3 miles to what looks like the end of this valley. You will then turn to starboard. Fix 8 - The River Basins Diverge - Heading of 020 but for a short time. At Fix 8, you will turn to starboard setting a heading for 020, but you will only fly this heading shortly as the river quickly bends back to port. This is the Leduc River coming toward us fro the left with the Chickamin River veering off to the right. Fix 9 - Round the Bend - set a heading of 341 for 3 miles. At Fix 9 follow the bend around to port on a heading of 341 for about 3 miles. Your next turn will follow the river basin a little to starboard to fly a straight section of the basin. We are now in the Leduc River Basin and will follow it to its source, the foot of the Leduc Glacier 20 miles ahead and 5500 feet above us. Fix 10 - Continue to follow the Leduc Basin changing heading to 009.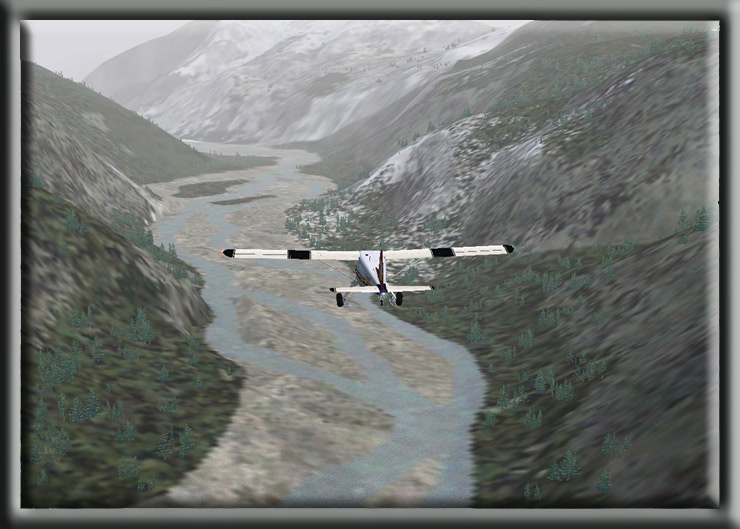
At Fix 10 -Change your heading to 009 and follow this heading up the river for 4 miles. You'll be following the curves in the river as that become a little more frequent as we near the glacier. Fix 11 - Continue the Turns .. Heading 344 for 3 miles. At Fix 11 -Correct your heading to 344 for and maintain it for 2.7 miles. Fix 12 - Start your climb to the Glacier and set a heading of 009 for 3 miles. Change your heading back to 009 for 3.6 miles ... continuing to wind you way along the basin following the meandering Leduc River.
Fix 13 - Continue Increasing your Altitude and set a heading of 037 for 6 miles At Fix 13, set a heading of 037 and CONTINUE INCREASING ALTITUDE TO 6000 feet at 700 fpm. You will continue this heading for 3 miles. We are about 6 miles from the glacier. Fix 14 - Set a heading of 072 and the Glacier comes into Sight At Fix 14, make a turn toward starboard setting your heading at 072. Once you make the turn, you will see the foot of the Leduc Glacier coming down the mountain above you, continue to increase your altitude. Your next course correction is 3 miles ahead, only a slight adjustment in heading to port. Fix 15 - Over the Foot set your heading for 064 to follow it
to port. At Fix 15, change your heading slightly to 064 to stay over the center of the glacier's foot ... continue climbing (you'll be glad you did!). Fix 16 - Follow the Foot turning to 357 At Fix 16, turn left to a heading of 357 to follow the curve of the glacier, be ready for a turn to starboard as the glaciers turns. Follow this for about 2 miles. As you reach the summit of the glacier you will notice a "nanatuk" straight ahead of you.
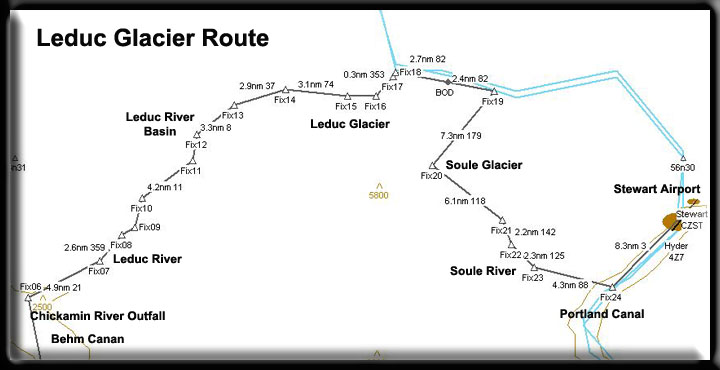
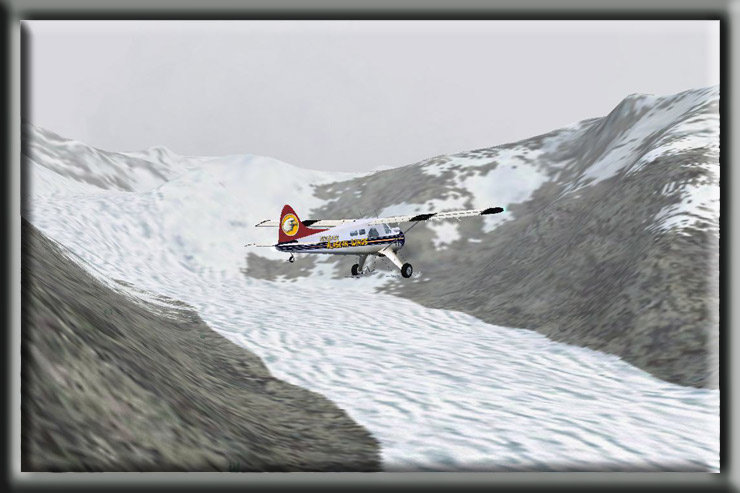
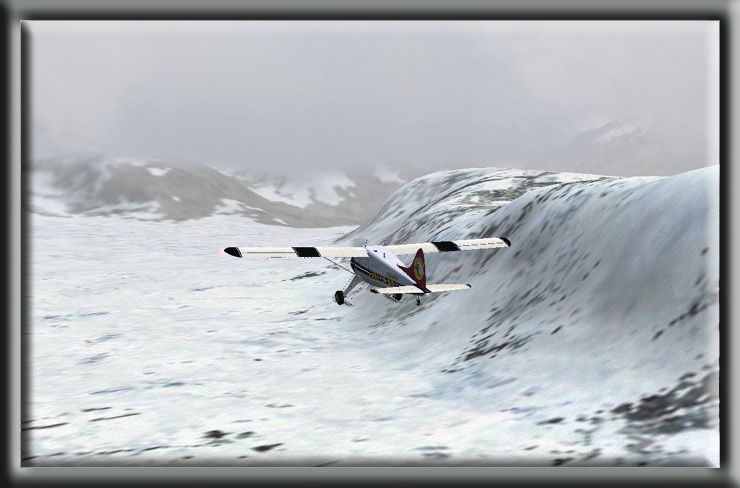
Fix 17 - A Tricky Turn to the Right to a heading of 179 At Fix 17, you are at the summit of the glacier, you will see a rounded hump just to starboard, you will want to fly to the right around that hump changing your heading to 179. On this heading, you will fly down the Leduc Glacier heading for the Soule Glacier. You will maintain this heading for 7 miles. If you would like to land on the glacier, there are several safe places on this particular leg of the flight. Fix 18 - Crossing the Chickamin Glacier and the Through Glacier on a heading of 179 for 7 miles At this fix, set your heading for 179 degrees. Maintain your altitude flying this leg for 7 miles. You will be crossing the Chickamin Glacier ... look down into the valley on the right and you will see the Chickamin River Basin miles below, a beautiful view on a clear day. Ahead, you will see the Through Glacier. There are some good places to land on this glacier also. Fix 19 - Turning down the Through Glacier, heading of 118 for
6 miles Over the center of the Through Glacier, turn left to a heading of 118 and maintain this course for 6 miles. At the end of this glacier we will be turning to the right onto the Soule Glacier. As you approach the turn to the Soule Glacier, look over the edge and you will see "No Name Lake," a jewel of a lake nestled in the valley below. It is at an altitude of only 606 feet. Fix 20 - At the Soule Glacier turn to 142 - reduce altitude. Turn right over the Soule Glacier, to a heading of 142. You should begin reducing altitude.
Fix 21 - At the foot of the Soule Glacier stear to 125 down to the valley below. Fly a heading of 125 over the foot of the Soule Glacier and on down to the melt waters that form the Soule River. We will follow the Soule River to its outfall in the Portland Canal, about 6 miles from here. Continue your descent toward 1200 feet at 900 fpm. Don't forget to reduce your engine revolutions so you do not overspeed. Fix 22 - As you pass Hayford Mountain and enter the Portland Canal, turn to 088. Turn to 088. The large mountain passing to your right is Hayford Mountain. Ahead you can see the outfall of the Soule River into the beautiful Portland Canal. We will be flying out over the Portland Canal and turning to port to line up for an approach at Stewart, BC. Fix 23 - Line up for the Approach to Stewart BC on a heading of 003.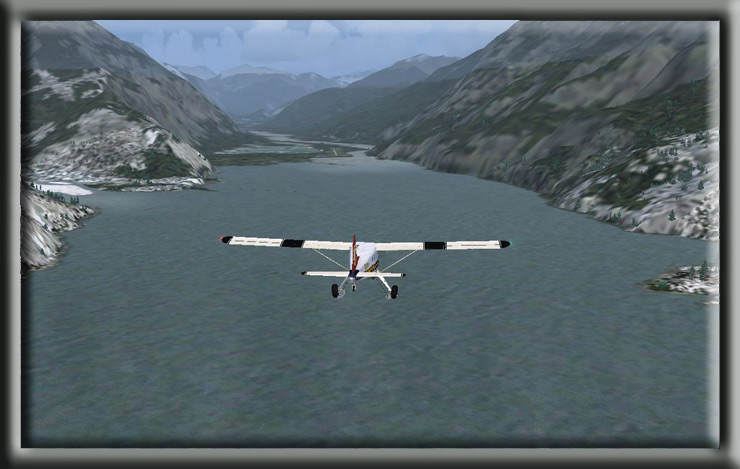
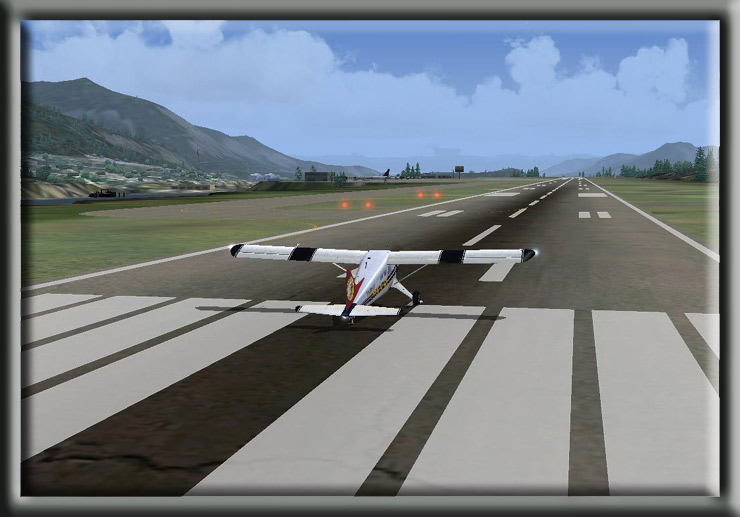
Fly almost across the Portland Canal, then turn to port to a heading of 003. This will line you up for your approach at Stewart, BC. Adjust altitude accordingly for a safe landing. As you approach Stewart, the Salmon River outfall will appear on your left. These are the melt waters from the Salmon Glacier some 5000 feet above you. The Salmon River is one of the best salmon fishing rivers in the world. The small community beside the outfall is Hyder, AK. Welcome to Stewart, BC ... we hope you enjoyed your flight. If you have not yet flown the Chickamin River Route, you can download the route from the top table. If you don't want to fly the first 6 fixes again, then you can fly direct to Fix 6 and use the information listed below for the Chickamin River flight. You will find it is an entirely different scenery, just as beautiful and you will see several glaciers you've not yet seen.
|
|
Route Notes:
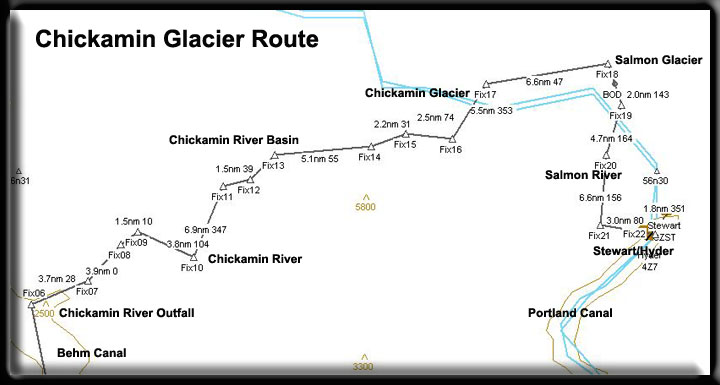
As you follow the Chickamin River basin, you will need to make a heading correction to port coming to a heading of 360, a slight turn to the left. Below, you are looking at the combined melt waters from the the Leduc and Chickamin glaciers. This leg is 3.9 miles long.
Fix 8 - As the rivers split, correct heading to 010. Continuing to follow the basin, make a slight heading to starboard correcting heading to 010. Ahead, you will see the rivers diverging. The Leduc river is coming in from the left and the Chickamin river is coming in from the right. At our next fix, we will be taking a turn to the right to follow the Chickamin River to the Chickamin Glacier, still about 20 miles distant. Fix 9 - Turning up the Chickamin sharply to the right heading 113 for 4.4 miles You will make a sharp turn to starboard to a heading Fix 10 - Turn SHARPLY to port to 348 After you have made the sharp left turn, set your heading on 348. You will be following this basin valley for about 7 miles before you need to again correct your course. Fix 11 - Sharp turn to Starboard - Starting the Climb! At the end of this 7 mile straight run, be ready to make a rather sharp turn to starboard coming to a of 054, continuing to follow the basin. Note the basin begins a turn to the left shortly, continue to follow the basin.
Fix 12 - Zigzag to Follow the River turn to 009 Follow the river by turning to 009 at Fix 12. Fix 13 - Turning again to Follow the River to 058 for 6 miles At Fix 13, turn to 058. You will follow this valley for 5.9 miles. The foot of the glacier is just around the next bend to the left, watch for it as you come up to the fix. Fix 14 - Turning toward the Glacier to 026 Fix 14, turn to 026 toward the foot of the Chickamin Glacier that you see ahead. This is the source of the Chickamin River, the melt waters of the glacier. Fly about 2.2 miles to the foot of the glacier. Fix 15 - Up the Glacier on a heading of 083 Turn to starboard to a heading of 083. The route will become straight for 5 miles. You should be near your designated altitude of 6000 feet. (Recheck your barometer setting) Toward the end of this leg, you will begin to see the Chickamin Glacier curve around to the left and gain altitude. Fix 16 - Heading Toward the Glacier's Foot ... set heading to 349 and follow the flow of the glacier Turn to port to a heading of 349 following the flow of the
glacier. The summit of the Chickamin Glacier is now ahead of
you. This is the "snow source" for the glacier that
we have been flying over for the past 15 minutes. You will see
twin peaks called "nunataks" (see below) coming up
the left of our course. Across the glacier from them, you will
notice a gap in the terrain that will allow you to take a sharp
right turn. It looks like a downward
We now turn off this part of the glacier setting at heading of 047 to traverse the glacier. This leg is 6.6 miles long and has many places where you could land safely if you want to experience walking around on the glacier here at the top of Misty Fjords. Don't forget to put the skis "down." Fix 18 - The Salmon Glacier - Reducing your Altitude and turn to 143!At fix 18, you alter your heading to 143 turning to starboard and coming over the small Salmon Glacier. Once you make the turn, you'll see the glacier, and its foot ahead of you. The glacier melt waters flow down into the valley beyond becoming the famous Salmon River ... one of the best Salmon fishing rivers in the world. Fly this leg for 3.3 miles.
Fix 19 - The Headwaters of the Salmon River heading 164 Make a small heading correction to 164, you will fly this for 4.7 miles. We will be following the Salmon River Basin to its outfall into the Portland Canal, about 12 miles ahead. Continue descending at about 800 feet per minute, gliding down the Salmon River Basin. This is the source water for the beautiful Salmon River. Fix 20 - Heading toward the Portland Canal, heading 154 Adjust your heading to 154, fly this for 3.8 miles. Ahead you will see the beautiful Portland Canal. As you continue to reduce altitude, you will be flying to the outflow of the Salmon River. On your left will be the little settlement of Hyder. We will fly out over the canal and turn to port making an approach to Stewart's airport. This would be a good time to contact Stewart ATC and make sure they know you are coming to them. Fix 21 - Flying by Hyder, AK ... be ready to turn to 129 Adjust your heading to about 129. Fly to the right side of the basin, toward the point of land where the mountain touches the Portland Canal. Once you are at that point, near the mountain, you will swing out into the center of the Portland Canal turning to the left lining up for your approach to Stewart, BC. Fix 22 - Lining up for Stewart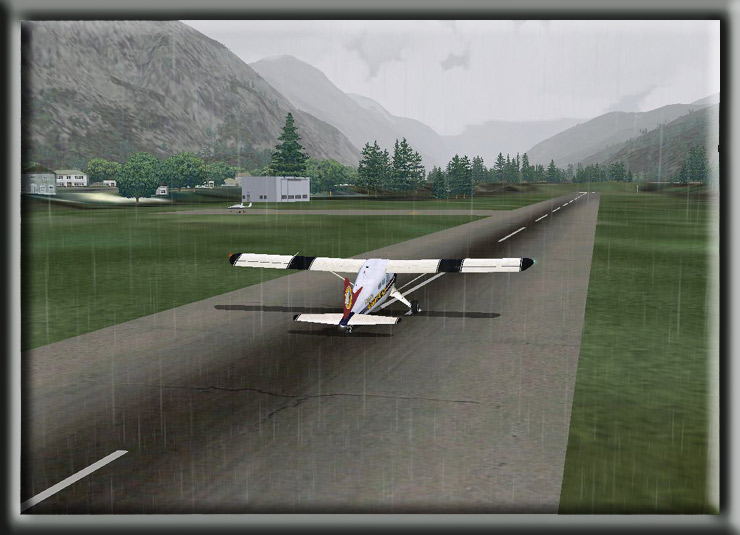
At fix 22. Swing to the left out over the Portland Canal and line up on the runway for Stewart, BC. Fix 23 - Approach and Landing at Stewart You should be lined up and on approach for Stewart airport at this fix. Welcome to Stewart, BC and Hyder, AK. We hope you enjoyed the flight. If you have not done so yet, you can reset your FSNavigator and load the "Leduc.fsn" plan. If you do not want to fly the approach, set yourself up at Fix #6. You will again enter the Chickamin River basis at its outfall to the Behm Canal. As you fly up the basin, instead of going to the right up the Chickamin, you will go to the left for an entirely different glacier flight ... just as beautiful, but vastly different.
|
|
Comments to Doug Hope you enjoyed the flight. If you have any questions or comments, you can contact me at contact@mistymoorings.com.
Credits and Thanks To learn more about the area, I encourage you to go to the following websites where the information for this flight was found. Many of these listed websites are very good reading for background on the area. Our thanks to these websites: Note 1: Information from: Alaska Inn by the Sea: http://www.alaskatravelers.com/ketchika1.htm Note 2: Information from Blueberry Hill Bed & Breakfast. Highly suggest you check out this website. There is a great deal of information about the area here, and frankly, it is a beautiful website to visit: http://www.blueberryhillbb.com/history.html Note 3: Information from The National Snow and Ice Data Center (NSIDC). The information we posted here is only a small sampling of the information available on this MOST informative site. Check it out to learn a great deal more about glaciers. You can find there website here: http://nsidc.org/glaciers/story/ Note 4: From GORP, fascinating information about the Ketchikan area and Misty Fjords. For those who want to know more details about the area (such as the strange-looking New Eddystone Rock), this is an excellent website to visit: http://gorp.away.com/gorp/resource/US_Wilderness_Area/ak_misty.htm Note5: From the ExploreNorth.com web site. This site is absolutely heavily laden with information about Alaska, history, places, etc. Well worth your time to explore this site and all the information it has to offer: http://www.explorenorth.com/articles/rey/spanish-irish.html
|
||||||

| ©2004 mistymoorings.com |